


The Virtual Private Server (VPS) is now becoming a mainstream and popular hosting option for all kinds of websites and applications. The market share of Virtual Private Servers (VPS) has doubled in the last five years, and its growth is expected to be exponential in the next five years, as more and more WebMasters prefer VPS over shared hosting now. VPS is still a sophisticated hosting environment, but the preferences and capabilities of WebMasters to manage the cloud have improved a lot recently. Additionally, the pricing of VPS is now more competitive than before.
Since VPS hosting is offered by almost all cloud service providers, choosing the right one has become extremely challenging.


We have been using VPS since 2012, mostly from DigitalOcean and Linode (now Akamai Cloud). DigitalOcean has always been a no-brainer recommendation for anyone looking for a reliable VPS for a website or application until I tried Hostinger VPS. It was surprising and unbelievable to see the resources Hostinger offers for the same price as DigitalOcean (Get Free $200 Credit). The only downside of Hostinger VPS is that you need to commit to a minimum of one year to avail the best offers. However, a monthly plan is also available with very minimal discounts.
For those who prefer an hourly billing system, have short-term requirements, or are unsure about their resource needs, DigitalOcean remains one of the top VPS providers. However, for those with a clear understanding of their resource requirements, Hostinger is undoubtedly one of the best options right now.
Recently, we migrated 10–12 of our clients’ servers to Hostinger and reduced infrastructure costs by more than 50%, all while gaining more RAM, NVMe storage, and processing power, resulting in improved performance for websites and applications.
It will be interesting to see how Hostinger adjusts its renewal pricing after one or two years for these VPS plans. However, by then, buyers will have made significant savings on VPS, enough to afford upgraded infrastructure.
Hostinger is currently offering huge discounts on VPS. Additionally, you can get an extra 20% off on your VPS and private server purchase using our referral link. Now, let’s go through the basic steps to set up a Hostinger account and purchase a VPS:
1. Click here to get an additional 20% off on all server purchases with the Hostinger.
2. Now mouse hover on ‘Hosting” and click on “VPS Hosting”.

3. Choose the appropriate plan based on your requirements.
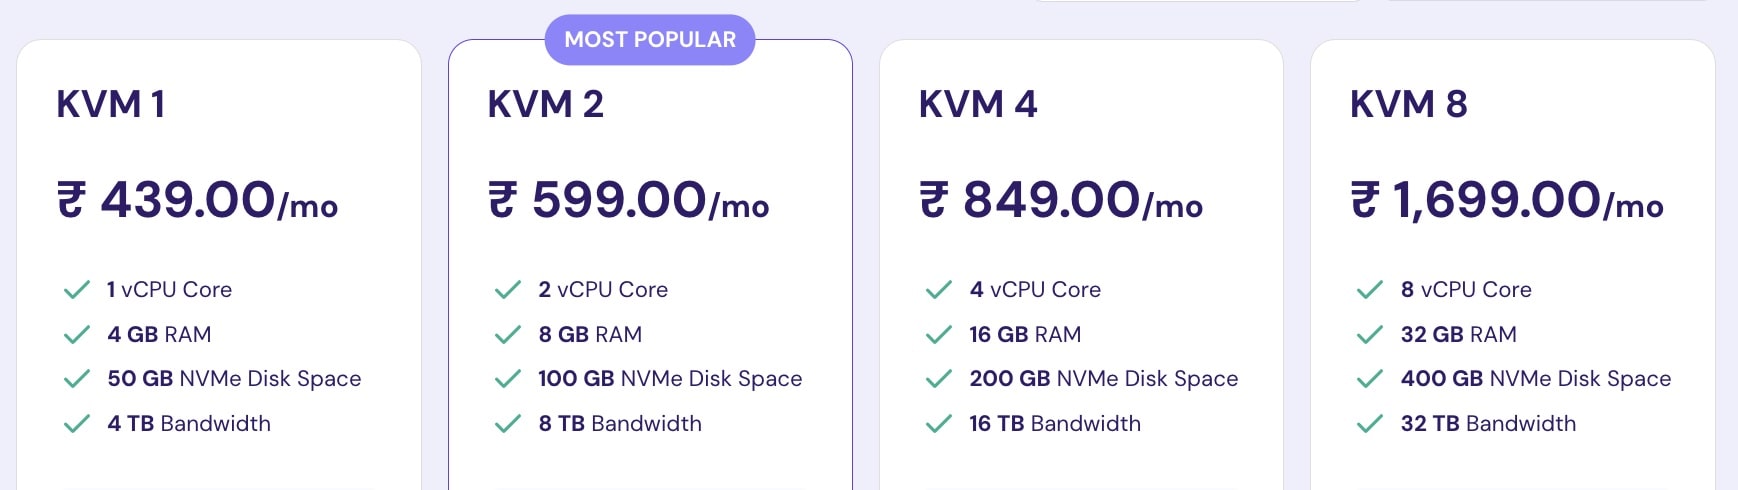

4. Choose Plan>> Select Subscription Period on the next page. It will show you the subtotal, discounts, and referral discounts. If you are not getting the referral discounts, then follow the direct link from the table below.
| KVM 1 | KVM 2 | KVM 4 | KVM 8 |
|---|---|---|---|
| ₹439.00/mo | ₹ 599.00/mo | ₹ 849.00/mo | ₹ 1699.00/mo |
| 1 vCPU Core | 2 vCPU Core | 4 vCPU Core | 8 vCPU Core |
| 4 GB RAM | 8 GB RAM | 16 GB RAM | 32 GB RAM |
| 50GB NVMe Storage | 100GB NVMe Storage | 200GB NVMe Storage | 400GB NVMe Storage |
| 4 TB Bandwidth | 8 TB Bandwidth | 16 TB Bandwidth | 32 TB Bandwidth |
| Click for 1 Year Plan | Click for 1 Year Plan | Click for 1 Year Plan | Click for 1 Year Plan |
| Click for 2 Years Plan | Click for 2 Years Plan | Click for 2 Years Plan | Click for 2 Years Plan |
5. Once you have finalised and selected the appropriate plan, you can proceed to register and create your account on Hostinger.
6. Now, you may register via Google Account by clicking on the ‘G’ icon and verifying with your Gmail credentials. Or, just enter your email address and a strong password and click on register.
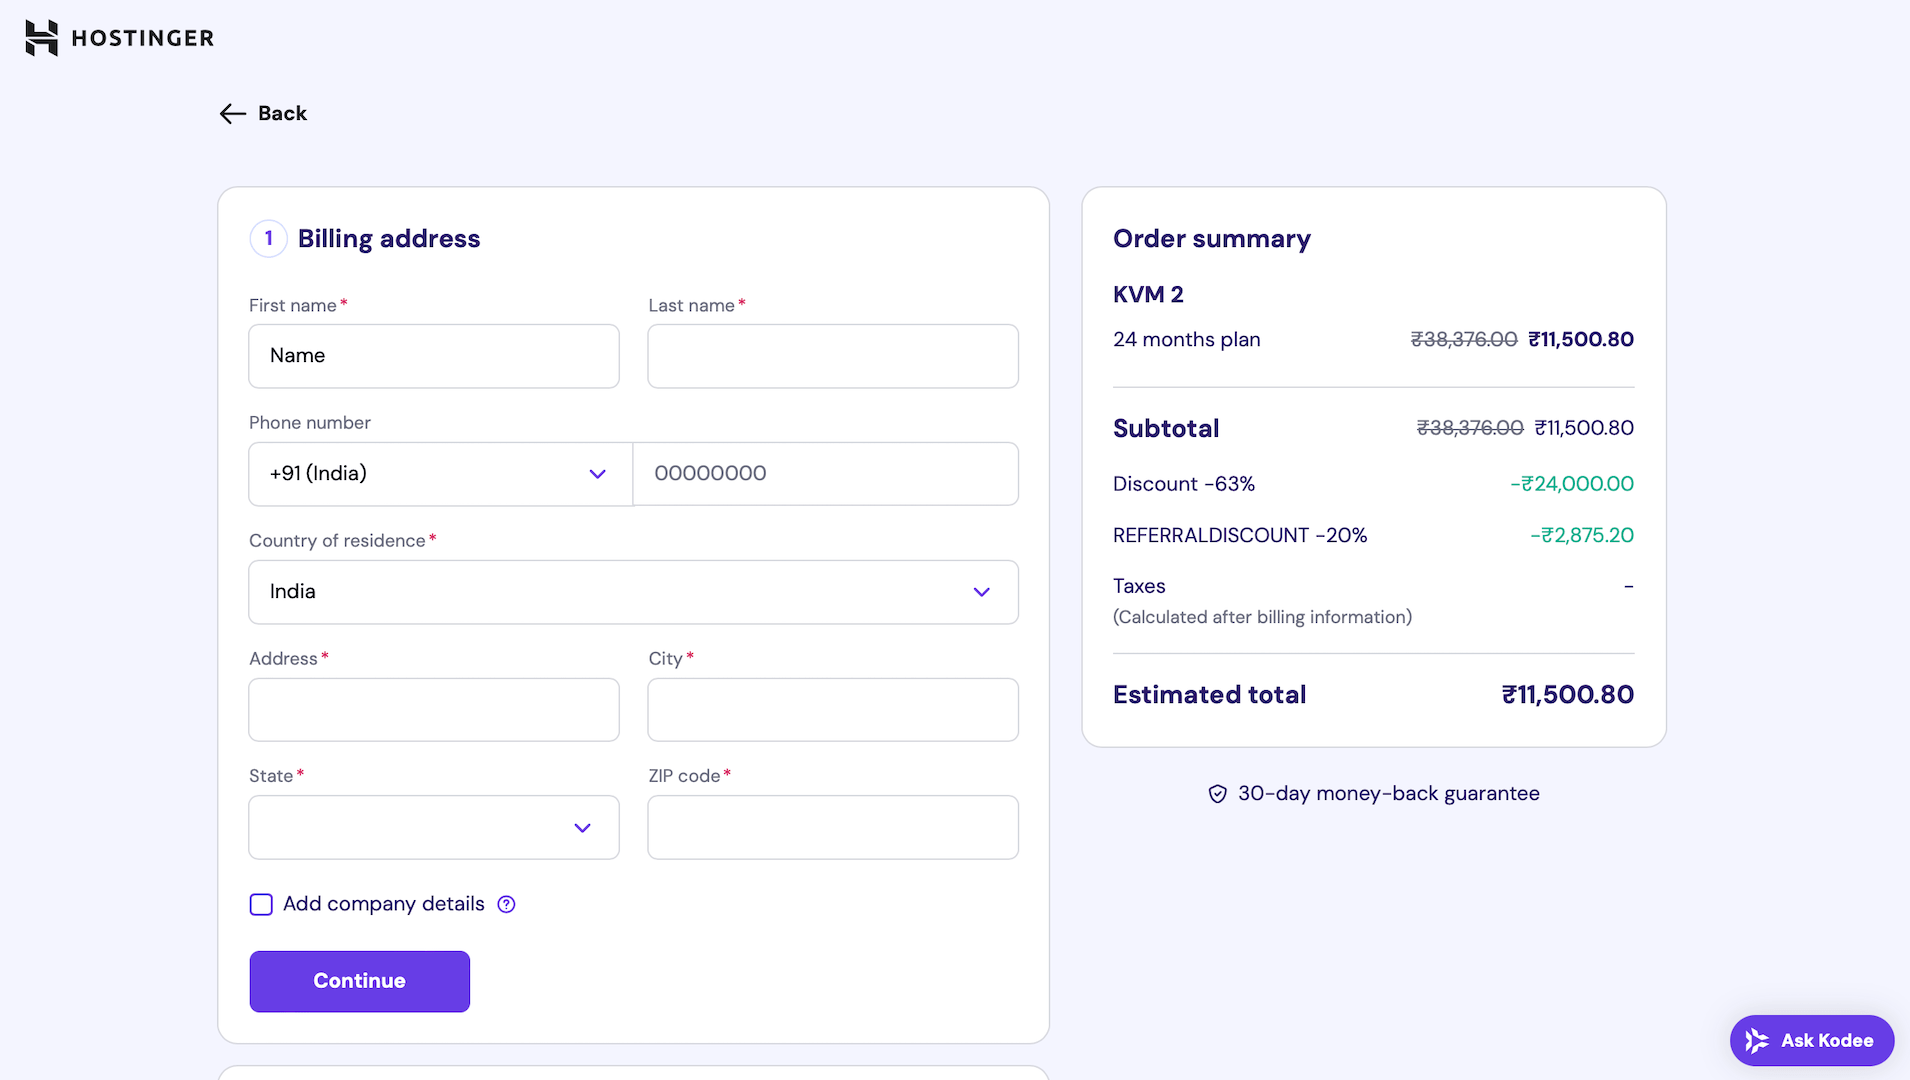
7. On the next screen, you will be asked to enter the billing address. Enter all details correctly and click on “Continue“.
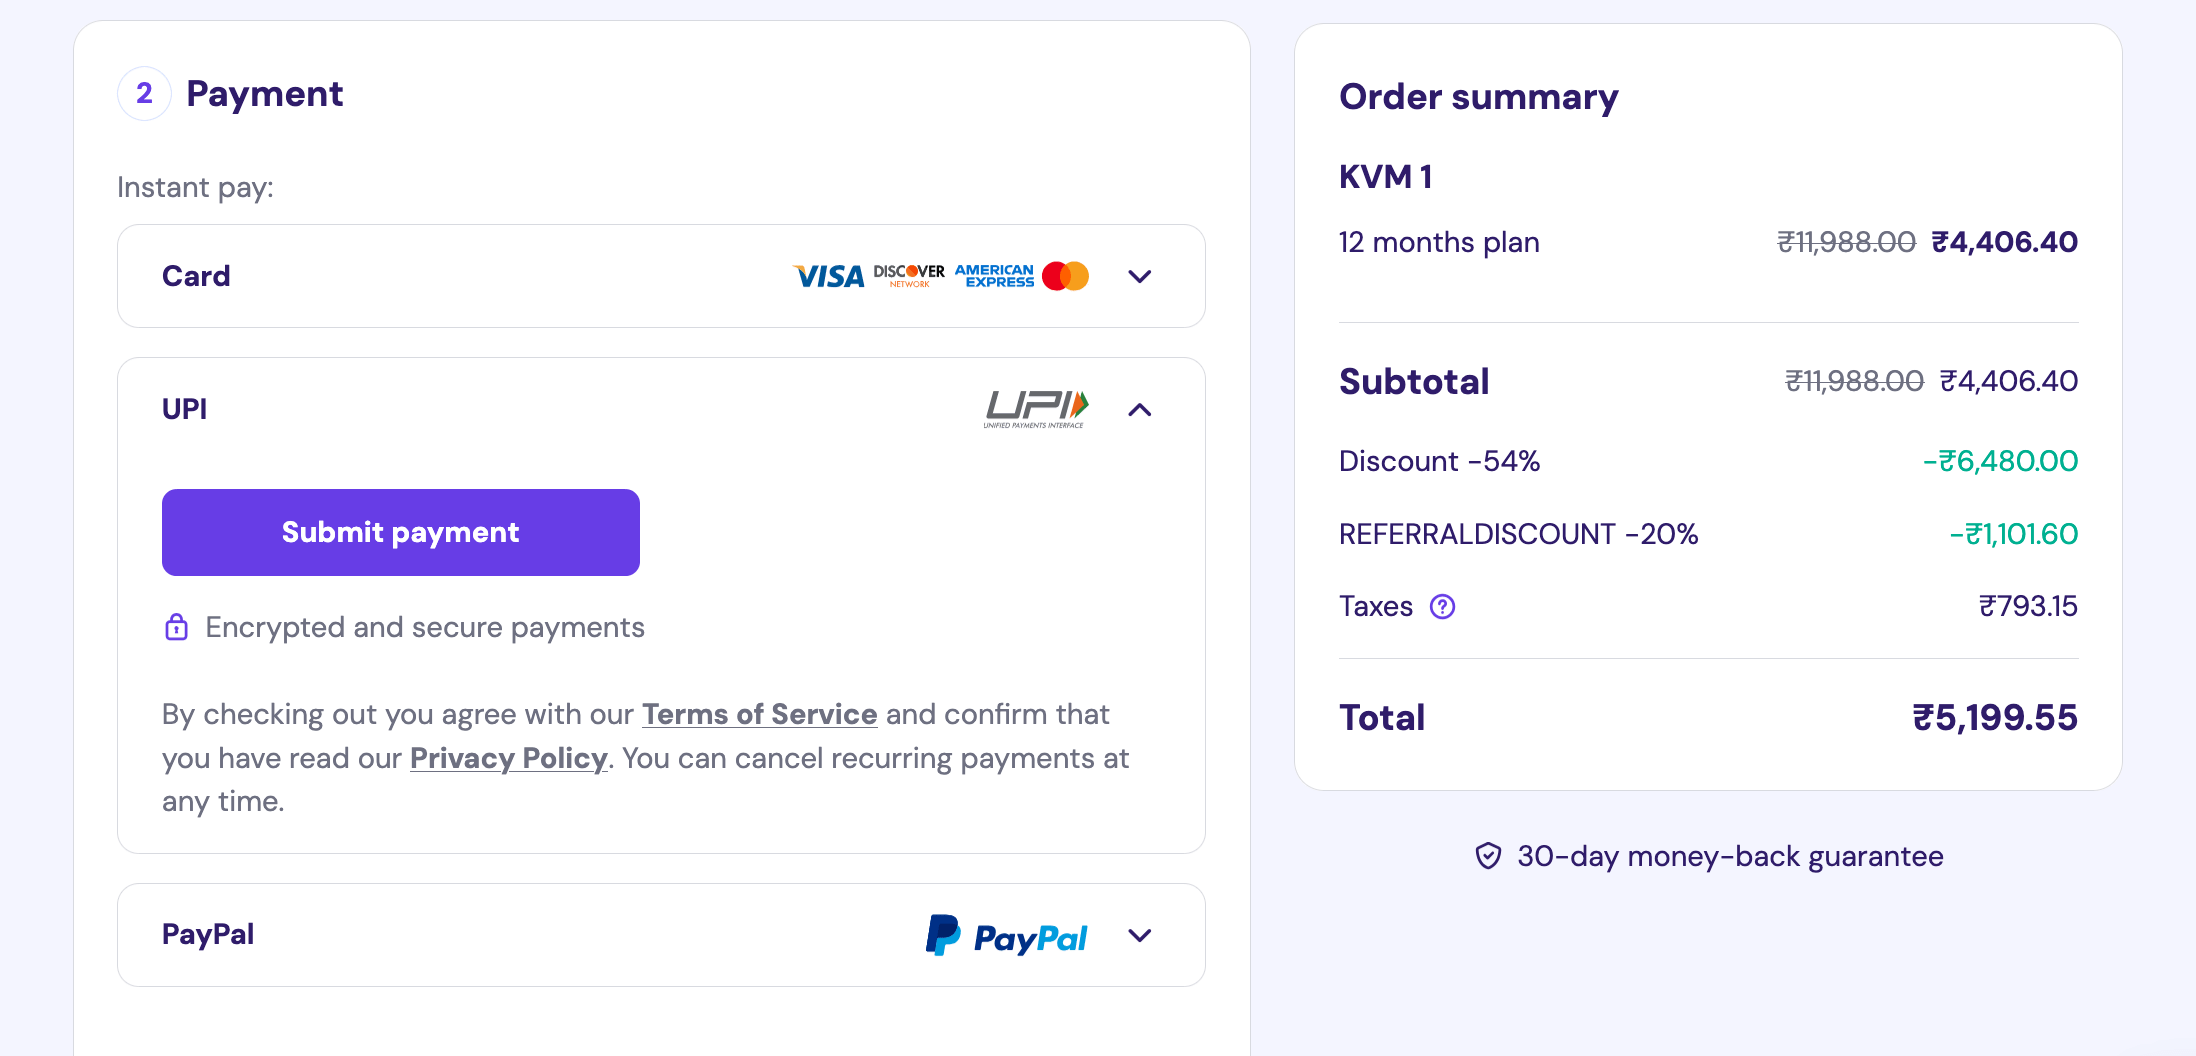
8. Review your details and plan you subscribing, make the payment with any of the given payment methods.
9. As soon as you complete the payment, you will be done with the registration and subscription process.
How to Setup Hostinger VPS for WordPress Website: Ubuntu, Nginx, PHP
After the successful payment or subscription of the Hosting VPS, you need to set up the VPS so that you can host your website or application on it. The server assets requirement can be relative and varies based on the project requirements, so let’s create a VPS with the most common and efficient setup for WordPress website hosting.
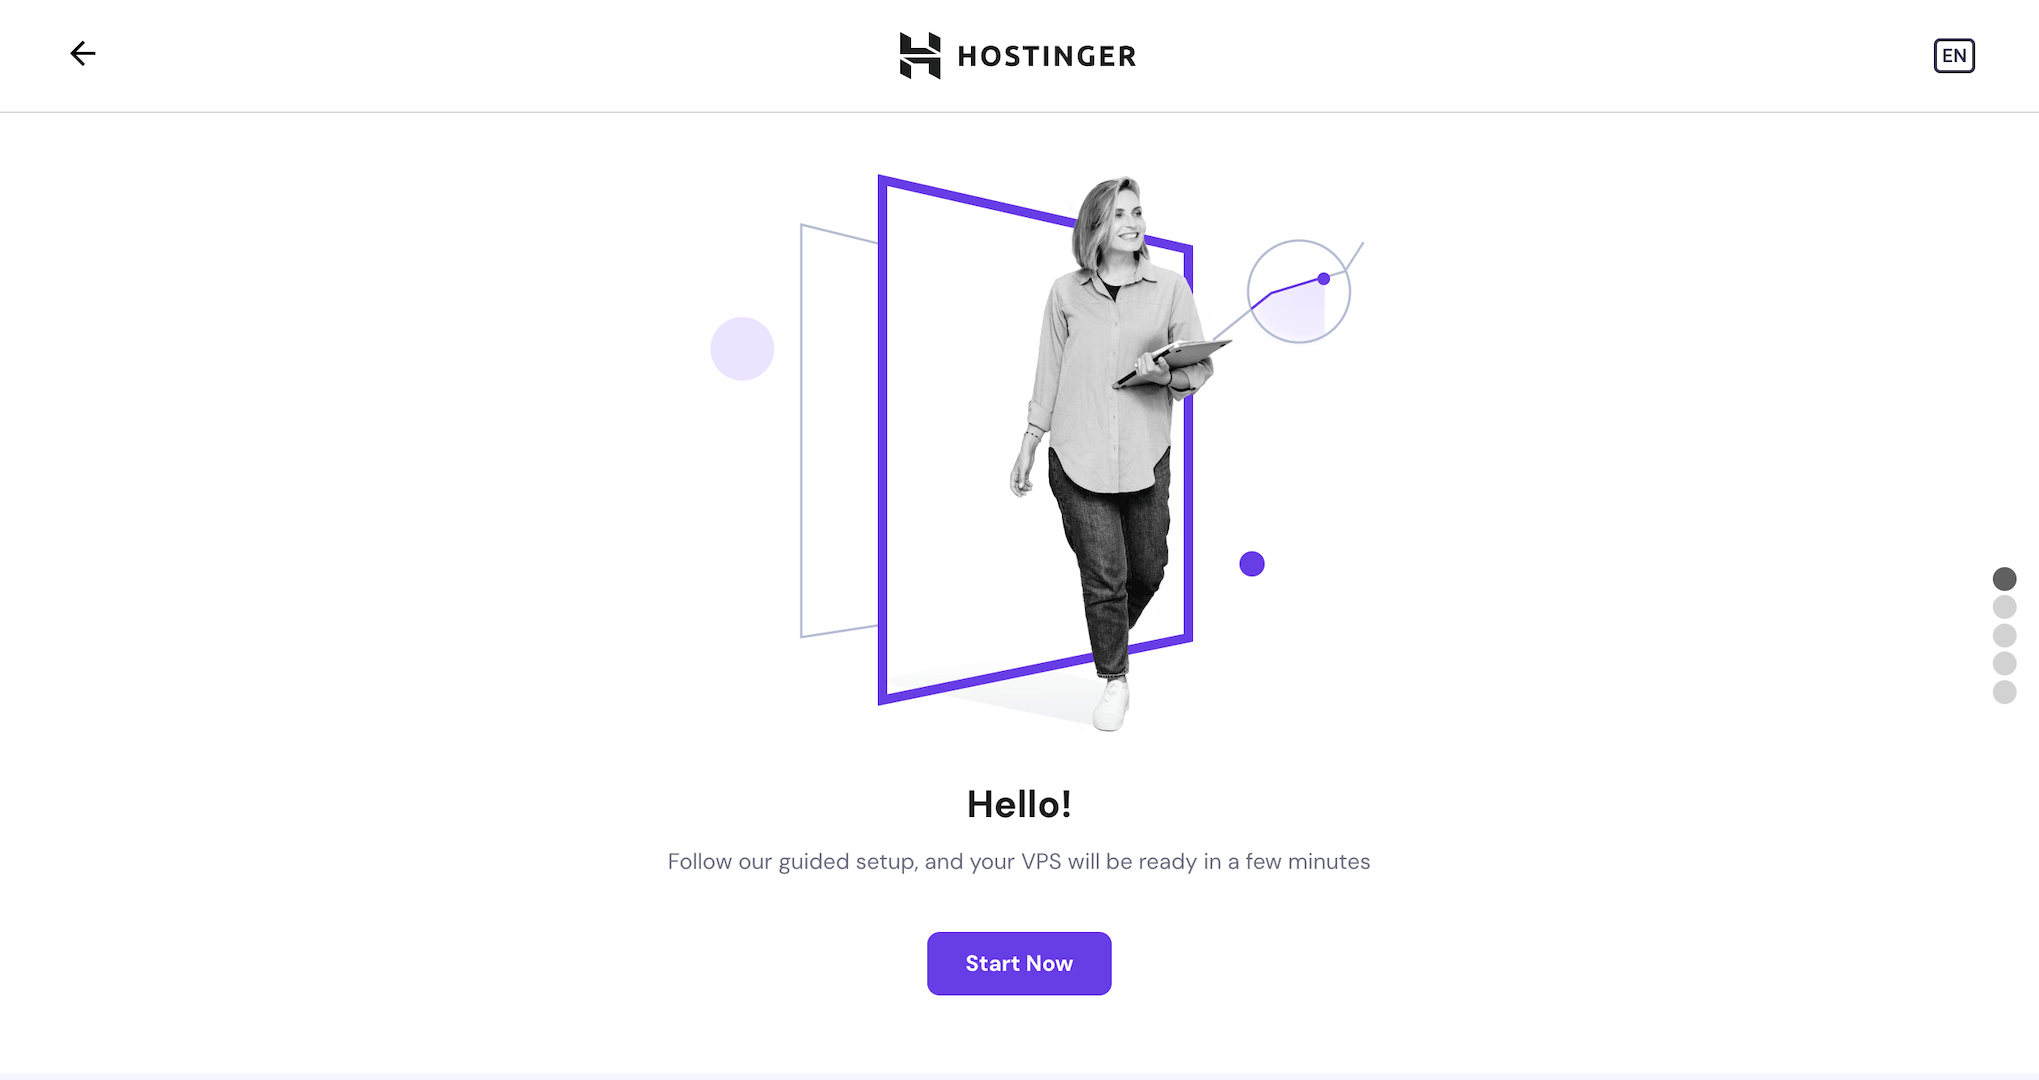
1. Once you complete the payment for the subscription, you will get the following or a similar page. Click on “Start Now”
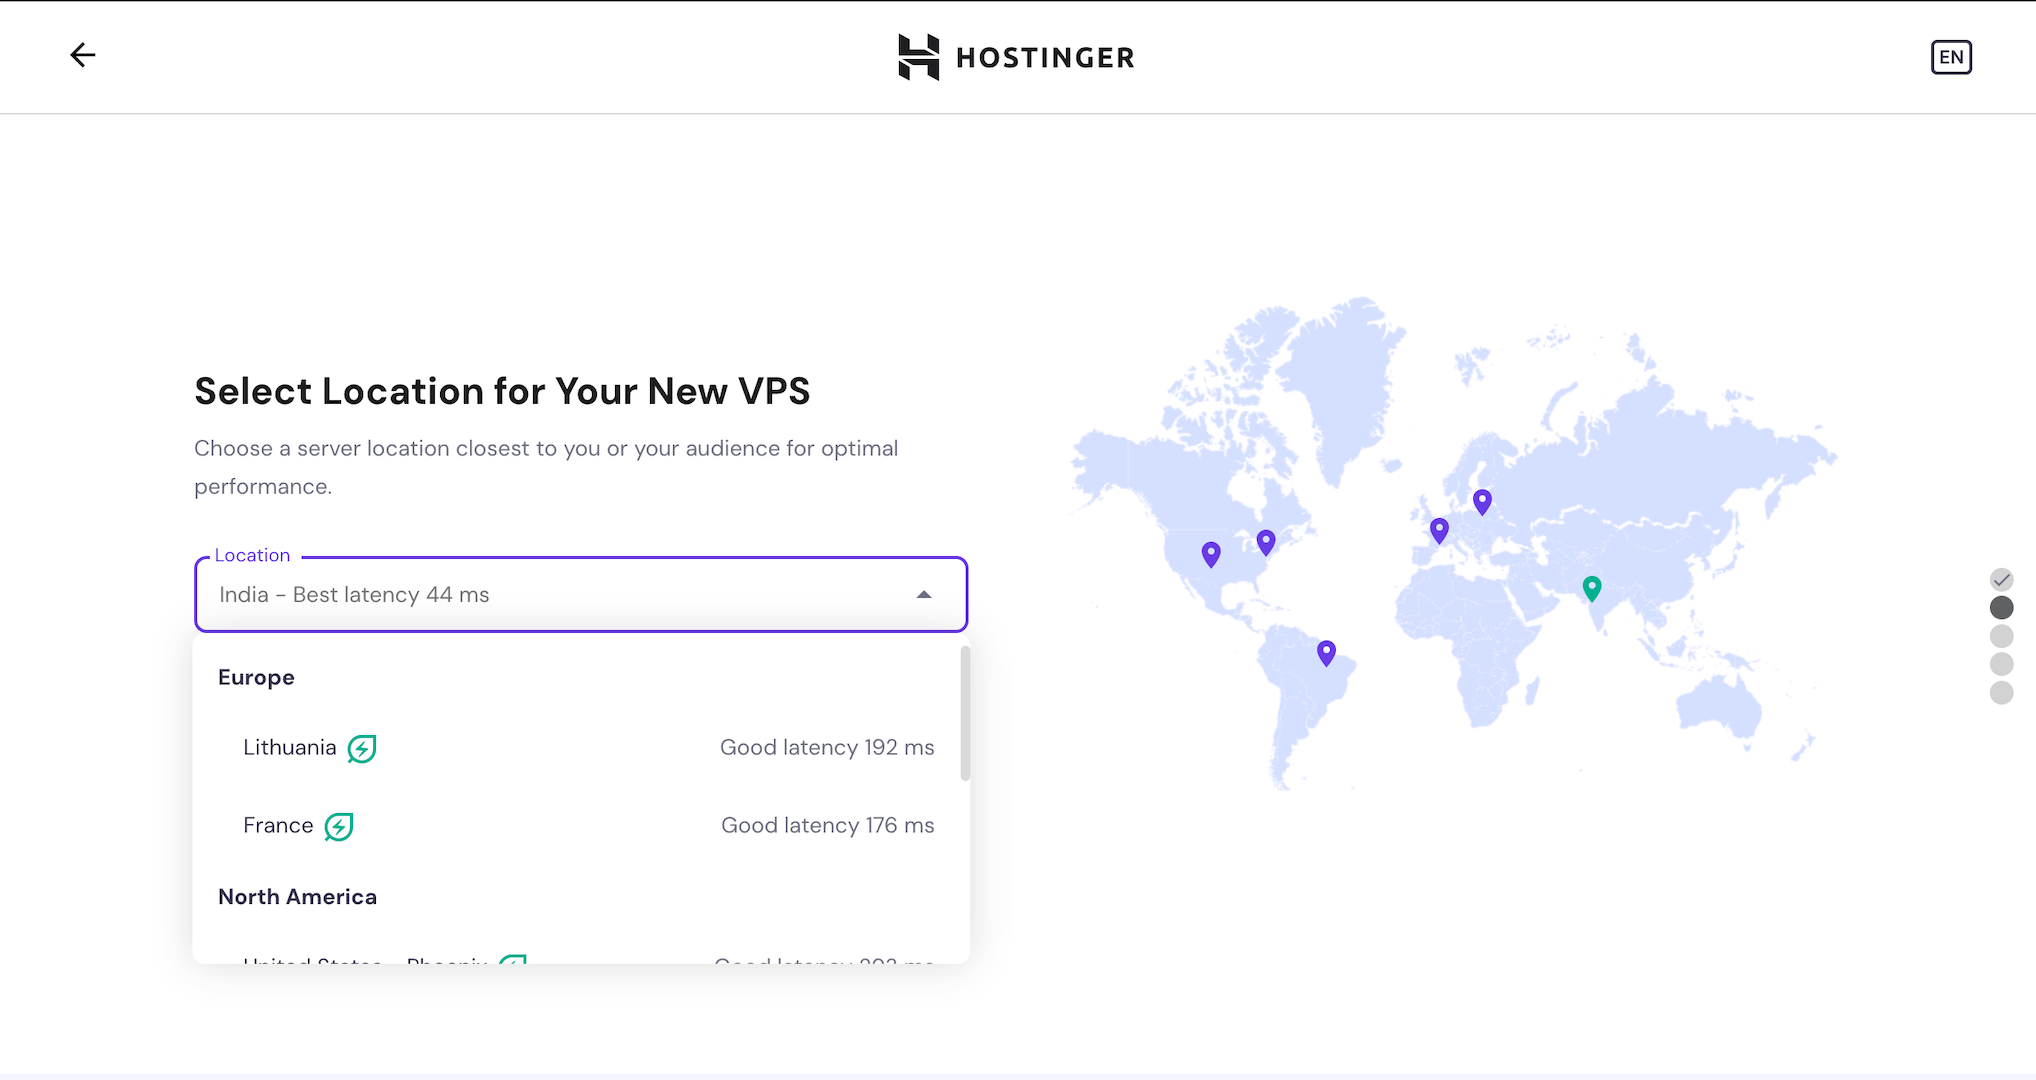
2. Choose the desired server location; prefer the nearest location for better latency.
3. Choose from the wide range of OS and applications; we would recommend going for the Ubuntu 24.04.
4. On the next screen, you will be offered to topt for the “Monarx Malware Scanner”; skip that and setup the UFW later instead.
5. Now create a very strong password for the root user and the hostname for your VPS >> Click on “Continue”

6. Click on “Finish Setup” to initiate the server configuration.

7. You get the following screen once Hostinger has completed the VPS setup based on your selected configuration.


What is Next? Now you have everything you need to install and configure the cloud/server to host your website or application. Other assets necessary to run any application need to be installed and configured. In the next article, we will guide the steps to install and configure Nginx, MySQL, PHP and WordPress on Hostinger VPS in the most efficient and optimised ways.


